Archive for February, 2011


Some friends and I are currently knee-deep in pre-production for an upcoming web series we are producing called “Welcome to the World,” and in preparation for it, we’ve done some camera tests so we know what to expect from our equipment. More importantly, however, we were interested in how Vimeo would handle the compression of our footage. Since we are relying on web delivery, we needed to know how it would affect our footage. I shot a project last summer that, when I uploaded to Facebook, turned out significantly darker than I planned. Since it was a dark film anyways, it was disappointing to see how much detail I lost in the shadow regions. So we’re attempting to avoid that problem and really evaluate what results we’ll get at the end of our workflow so we can light and shoot it appropriately at the beginning of the workflow. Here is the full camera test, embedded from Vimeo:

<p><a href=”http://vimeo.com/19601622″>Vimeo Compression Test: RED One vs. Panasonic AF100</a> from <a href=”http://vimeo.com/helenabowen”>Helena Bowen</a> on <a href=”http://vimeo.com”>Vimeo</a&gt;.</p>

We lit our test scene with a wide variety of exposures, ranging from an f/.7-1 split to an f/8-11 split. We included skin tones, blacks, a bit of color and tried to get a gradient on a projector screen in the background. Here’s a screen shot of our frame with the f-stop readings:

We shot two cameras side-by-side: the Red One and the new Panasonic AF100. Again, the primary purpose of this test is to investigate what Vimeo will do during compression, but we actually got an interesting insight into how this new $5000 camera will compare to this relatively well-established $30,000 camera. Not surprisingly, the RED came out with significantly better footage than the AF100. But I’ll talk about those results a little more later. For now, more on how we shot the test.

We set up the RED with a Cooke S4 35mm prime lens and the AF100 with a Zeiss SuperSpeed 25mm. Thanks to the AF100’s smaller sensor size and resulting crop factor, the focal lengths were roughly similar. In retrospect, we really should have put another SuperSpeed on the RED, but this isn’t a sharpness test, it’s an exposure test.

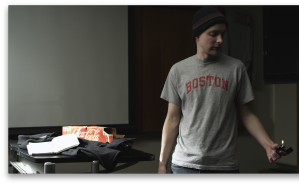
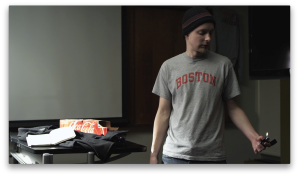
I captured all the footage in Final Cut Pro using the Log and Transfer tool, not RedCine-X or any other specialty application. It was edited into a ProRes 422 1080p24 timeline. At the end, I exported using Quicktime Conversion inside Final Cut to best-quality h.264 720p for Vimeo upload. I also attempted using the Mpeg-4 Codec, but it caused more artifacting after Vimeo compression and darkened our image signficantly. h.264 was more faithful to the original footage, as you can see in the two screenshots below. The first image is the ProRes-transcoded camera original and the second is the exported h.264 720p version before upload to Vimeo.

The RED footage was RAW, unedited, with no LUT applied. It retains its native 5600K white balance and is rated at ISO320. The AF100 was shot at ISO320 at 3200K white balance. We tested various different gamma settings, but we primarily used the HD Norm setting. There are also clips of Cine-Like D and Cine-Like V, but we didn’t like that as much. HD Norm gave us the most usable footage straight out of the camera, and gave us the best compromise of exposure and contrast. Cine-Like D gave us a wider dynamic range, but looked muddy and exacerbated some of the noise issues we found in the underexposed parts of the frame. It also necessitates a certain amount of post-processing, something we’re looking to minimize on our web series. Cine-Like V, however, crushed just about everything below 2 stops underexposed. This yielded the “cleanest” looking footage since all the noisy areas were crushed to black, but without lighting the scene specifically for that gamma setting, those shots became almost unusable. The RED, on the other hand, gave us very clean, noise-free footage that held up quite well even when reaching 4 stops underexposed. We were somewhat disappointed with the overexposed areas on both cameras, with each one starting to clip at about 3-4 stops overexposed. Keep in mind that the RED shoots RAW, and some amount of detail ought to be salvageable when using RedCine-X (keyword: ought).

We shot the test at several different stops on the lens to get an idea of how each camera would perform at different levels of over/underexposure and see how Vimeo reacted to those results. In general, we found that we started seeing artifacts and pixelation/blockiness in areas of 2.5 stops of underexposure and more. If you look closely in the lower right hand corner of the screen, you’ll notice it most. The dark wood holds up relatively well, but the off-white walls show serious levels of noise and artifacting. The projector screen on the left side of the frame is also susceptible to a certain amount of banding from the gradient-like lighting that Vimeo can’t seem to handle, but it was, I admit, better than I expected.

The last couple clips in the video are quick attempts to correct some of the footage shot at different exposures. Please note that I am NOT a professional colorist, and I personally prefer the color-correcting tool in Avid to the 3-Way Color Corrector in Final Cut. I apologize for my poor attempt to color grade these images. However, as always, exposure is key here. When we pushed the underexposed RED footage, it held up quite well and was relatively noise-free throughout. However, even pushing the AF100 one stop introduced unacceptable levels of noise that show how the AVCHD codec can really fall apart.

Overall, this was a really interesting learning experience. We found that a $30,000 camera is, as expected, better than a $5000 camera, though I admit I was pretty disappointed by the AF100 after all the hype it has been receiving. I’d be interested in repeating these tests not only with the new Sony PMW-F3 when it comes out, but with the Sony EX3, an industry-standard camera that is bested by the AF100 in sensor size, but comes in at a slightly higher cost. We also hope to repeat these tests sometime soon with the Alexa and the Canon 7D. I will most certainly post those results with my full analysis and comparison to the results we found here. With all this new information in mind, we now know that we need to watch out for areas of underexposure, especially on white or off-white walls. We also know that h.264 encoding holds up reasonably well, especially compared to Mpeg-4, and that we can expect to see pretty consistent exposure from camera original to web-delivered final product.

If you have any questions about our process here or have any suggestions for future tests, please comment below! Thanks to Trevor and Helena, my partners in crime on the web series, who helped with this test!

Hard Drives: The Bane of Our Existence

So my first official post is about hard drives. I hate hard drives. I don’t really consider them a proper piece of technology, they’re more like ticking time bombs. All we can do is pray for the best and take the necessary precautions to make sure our data is safe.

I suppose I’ll start with my thoughts on hard drive manufacturers and types. Not all drives are created equal, and not all manufacturers are created equal either. I am preferential to G-Tech, Western Digital and Seagate, personally. G-Tech is slightly more professional, while WD and Seagate are consumer-level drives. If you’ve got the money, Caldigit makes a fantastic drive, too. If you’ve ever had a discussion with someone about drives, you’ll find that everyone has their own opinions about which drives to trust and which to not. A lot of it is personal preference, or rather, it’s about which drives you’ve been lucky enough to not have fail on you. I recently had a terrible experience with LaCie, where not only did the drive fail within 6 months of purchase, but my efforts to get a replacement were met with a horribly frustrating experience with technical support. I’ve heard other people complain about drive controllers fail on their Western Digital drives, but I’ve had fantastic luck with their hardware. Like I said, personal preference. However, my one carved-in-stone rule is that you absolutely should never buy a hard drive from a manufacturer you’ve never heard of. Not failsafe, but it’s a good general rule.

There are two general categories of hard drives–solid state drives and traditional hard disk drives. The latter is what you’ll find in most modern computers and external hard drives. They’re cheap and easy to data manage and offer enormous quantities of storage space. The former is much newer, significantly faster and considerably more expensive. (You should know that SSD’s also have some compatibility issues with Mac OS X, but it’s pretty technical and I won’t go too much into that. Just something to be aware of.) Point being that SSD’s are definitely the future, but mass adoption has been slow. Think of a standard SD flash memory card in your digital camera, and multiply that by 10, and that’s basically the idea behind a Solid State Drive. From a professional filmmaking perspective, like the one I hail from, I recommend sticking with HDD’s for data backup and SSD’s (if you can afford them) for running your operating system. That way, your computer will be extremely fast on the system level, but you’ll have the cost benefits of HDD’s.

For crucial data, you need to think about redundancy–a Redundant Array of Independent (or Inexpensive) Disks, or RAID. There are different RAID levels, each describing the level of redundancy in your data. Essentially, the more redundancy, the safer your data is. Here are some of the basic RAID levels. There are many more, but these are the ones you will most likely encounter:

RAID 0: No actual redundancy. Two drives are “striped” together, creating one continuous volume. For example, two 500GB hard drives are striped together in a RAID 0 array to make a single 1TB disk. This is best for when you need an exceptionally fast disk, because you have two hard drive needles reading and writing your data. If one drive fails, you may lose all of your data.
RAID 1: Perfect redundancy. Two drives that are mirrored, so they are perfect duplicates of each other. No speed benefits, but instead just a perfect copy of all your data. Probably the safest way to store important media. Even though you would have two 500GB drives, your total disk space would still be 500GB, not 1TB. This is because you aren’t combining the available space from both drives, but instead you just have one drive that’s an exact copy of the other.
RAID 5: My favorite. This is a combination of RAID 0 and 1 with a minimum of 3 drives in the array. Two of the drives are essentially striped together, while the third contains parity data. This means that while the data is spanned across the two primary drives, the third keeps a record of how all the data fits together, so if a drive fails, you can rebuild all the data. The advantage here is that instead of losing half of your total hard drive space like in RAID 1, you only lose a third of your space (in a 3-drive array), plus get some of the speed advantages of RAID 1. If a drive fails, you won’t lose any data, but if a second drive fails before the first is rebuilt, then you can lose your data.

The last major piece of the puzzle is your interface, i.e. USB, FireWire, or eSATA. USB is by far the most common and slowest, and is found almost universally on all drives. It is the lowest common denominator, the one common element on most hardware. FireWire 400 and 800 are relatively common, especially on drives designed for media storage. It is faster and more reliable than USB and allows the drive and the computer to communicate back and forth simultaneously, unlike USB. eSATA is becoming more popular, and is theoretically over three times as fast as FireWire 800. Crazy fast. Each interface has its own benefits and uses: USB is great for documents and small photos, things like that. It can be connected to basically any computer anywhere. FireWire is found on almost any Mac, though hardly any Windows PC’s, and is relatively fast while still being inexpensive. eSATA is still waiting to become widely accepted, but it’s on the right track. (Another interface, Serial-Attached-SCSI, or SAS, is the fastest connection commonly available, twice as fast as eSATA. It is reserved for professional high-speed setups and comes with an equally professional price tag. SAS will probably stay in that portion of the market, and for the average consumer, won’t affect your purchase in the next few years unless you’re a professional video editor looking at a Caldigit hard drive system.) My recommendation: purchase a drive with as many connectors as you can get. FireWire 800 is a necessity, and eSATA is highly recommended for upgradability. Most drives also include USB, which is good to have “just in case.” And now that USB 3.0 is coming out, you’ll have some future-proofing there if you can find one that supports that new version.

That pretty much sums up my overview on hard drives. I could write volumes (no pun intended) about all the intricacies of hard drives, but this is long enough as is and will hopefully at least provide a starting point for anyone looking to invest in digital storage. As a filmmaker and photographer, preserving my data is of utmost importance. It’s critical to either back up your data to multiple drives or invest the money in a quality drive. If there’s anything I missed or anything anyone would like to learn more about, let me know and perhaps I’ll do a second edition of this hard drive post.